Imagine this: You're chilling at a café, sipping your favorite latte, and suddenly you need to access your IoT devices back home. What do you do? Panic? Nope! With IoT SSH from anywhere free on Windows 10 Command Line, you’ve got the ultimate power to control your devices from any corner of the globe. Sounds too good to be true? Well, it’s not. Let me break it down for you.
Let’s face it—technology is evolving faster than we can say "smart home." IoT (Internet of Things) has become a game-changer, allowing us to connect everything from our thermostats to our security cameras. But what happens when you’re not home and still need to manage those devices? That’s where IoT SSH comes in, giving you remote access without breaking the bank.
Now, before we dive deeper, let me tell you something cool—this isn’t just for tech wizards. Even if you’re a beginner, you can set up IoT SSH on your Windows 10 machine using the command line. Trust me, it’s easier than you think. So, buckle up, because we’re about to take a deep dive into the world of IoT SSH.
Read also:Superman Iv The Quest For Peace Cast Ndash A Deep Dive Into The Heroes And Villains
What Exactly is IoT SSH and Why Should You Care?
Alright, let’s get one thing straight—IoT SSH isn’t some fancy buzzword. It’s a practical solution that allows you to securely access your IoT devices from anywhere in the world. SSH (Secure Shell) is like a secret tunnel that lets you connect to your devices remotely, and when you combine it with IoT, you’ve got a powerful tool at your fingertips.
But why should you care? Well, think about it. How many times have you forgotten to turn off a smart light or adjust the thermostat before leaving the house? With IoT SSH, you can fix those issues without lifting a finger—just open your laptop, fire up the command line, and you’re good to go.
Plus, it’s free! You don’t need to spend a fortune on expensive software or subscription services. All you need is a Windows 10 machine, an internet connection, and a little bit of know-how. Sounds pretty sweet, right?
How Does IoT SSH Work on Windows 10?
Here’s the deal—IoT SSH works by creating a secure connection between your Windows 10 machine and your IoT devices. When you use the command line, you’re essentially sending instructions to your devices over the internet. It’s like giving them a remote control, but way cooler.
To make this happen, you’ll need to set up an SSH server on your Windows 10 machine. Don’t worry—it’s not as complicated as it sounds. Once the server is up and running, you can connect to it from anywhere using an SSH client. And the best part? It’s all done through the command line, so you don’t need any fancy interfaces or apps.
Setting Up IoT SSH on Windows 10 Command Line
Now that you know what IoT SSH is and why it’s awesome, let’s talk about how to set it up on your Windows 10 machine. I promise it’s not as scary as it sounds. Follow these steps, and you’ll be up and running in no time.
Read also:Donna Kelce Hospitalized Today Breaking The News You Need To Know
Step 1: Enable the OpenSSH Server
First things first—you need to enable the OpenSSH server on your Windows 10 machine. Here’s how:
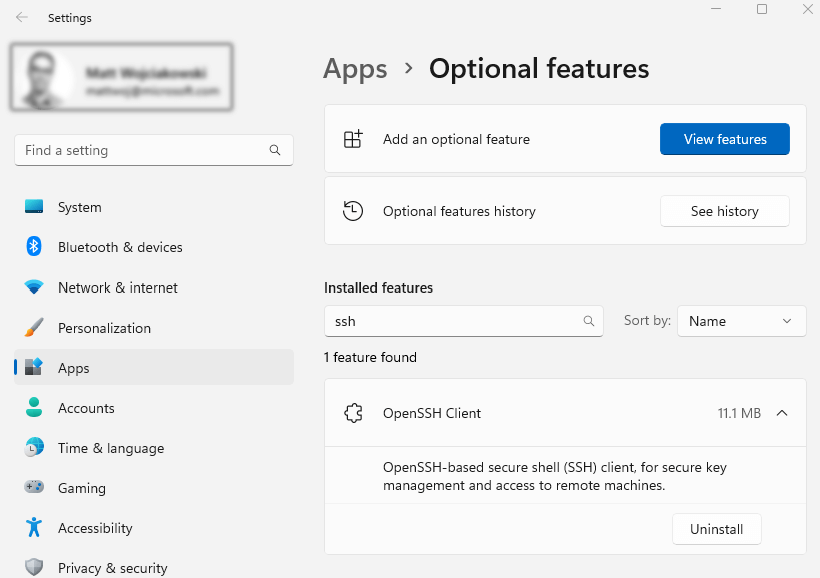
- Open the Start menu and go to "Settings."
- Click on "Apps" and then select "Optional features."
- Click on "Add a feature" and search for "OpenSSH Server."
- Select it and click "Install."
Boom! You’ve just enabled the OpenSSH server on your machine. Easy peasy, right?
Step 2: Configure the Firewall
Next up, you need to configure your firewall to allow incoming SSH connections. Here’s what you do:
- Open the Windows Defender Firewall settings.
- Click on "Advanced settings" and then select "Inbound Rules."
- Click on "New Rule" and choose "Port."
- Enter "22" as the specific local port and select "TCP."
- Allow the connection and apply the rule to all profiles.
There you go—your firewall is now ready to handle SSH connections.
Connecting to Your IoT Devices Using IoT SSH
Alright, now that your server is set up and your firewall is configured, it’s time to connect to your IoT devices. Here’s how you do it:
Step 1: Find Your IP Address
First, you need to find the IP address of your Windows 10 machine. Here’s how:
- Open the command prompt and type "ipconfig."
- Look for the "IPv4 Address" under your active network connection.
That’s your machine’s IP address. Write it down—you’ll need it later.
Step 2: Connect Using an SSH Client
Now, you need to connect to your machine using an SSH client. Here’s how:
- Open the command line on your remote machine.
- Type "ssh username@ip_address" and press Enter.
- Enter your password when prompted.
And just like that, you’re connected to your IoT devices from anywhere in the world. Pretty cool, huh?
Tips and Tricks for Using IoT SSH
Now that you know how to set up and use IoT SSH, here are a few tips and tricks to make your life even easier:
Tip 1: Use Strong Passwords
Security is key when it comes to IoT SSH. Make sure you use strong, unique passwords for your devices and your Windows 10 machine. And don’t forget to enable two-factor authentication if possible.
Tip 2: Keep Your Software Up to Date
Technology evolves fast, and so do security threats. Keep your Windows 10 machine and your IoT devices up to date with the latest software and firmware updates. It’s the best way to stay protected.
Tip 3: Use a Static IP Address
If you’re planning to use IoT SSH frequently, consider setting up a static IP address for your Windows 10 machine. It’ll save you the hassle of finding your machine’s IP address every time you want to connect.
Common Issues and How to Fix Them
Let’s face it—things don’t always go according to plan. Here are some common issues you might encounter when using IoT SSH and how to fix them:
Issue 1: Connection Refused
If you’re getting a "connection refused" error, double-check your firewall settings. Make sure port 22 is open and allowed for incoming connections.
Issue 2: Authentication Failed
If you’re having trouble authenticating, make sure you’re using the correct username and password. Also, check that your SSH server is properly configured.
Issue 3: Slow Connection
If your connection is slow, try optimizing your network settings. You might also want to consider using a faster internet connection if possible.
Why IoT SSH is a Game-Changer
Let’s take a moment to appreciate just how awesome IoT SSH really is. Here are a few reasons why it’s a game-changer:
- It’s free—no expensive software or subscription services required.
- It’s secure—SSH provides a safe and reliable way to access your devices.
- It’s easy to set up—even beginners can get it working with a little guidance.
- It’s versatile—you can use it to manage everything from smart lights to security cameras.
With IoT SSH, the possibilities are endless. Whether you’re a tech enthusiast or just someone who wants to keep their smart home running smoothly, this tool is a must-have.
Conclusion
So there you have it—everything you need to know about IoT SSH from anywhere free on Windows 10 Command Line. From setting up the server to connecting to your devices, it’s all pretty straightforward once you get the hang of it.
Remember, security is key when it comes to IoT SSH. Use strong passwords, keep your software up to date, and don’t be afraid to experiment with different configurations to find what works best for you.
Now it’s your turn. Try setting up IoT SSH on your Windows 10 machine and see how it works for you. And don’t forget to share your experiences in the comments below. Who knows—you might just inspire someone else to give it a try!
Table of Contents

:max_bytes(150000):strip_icc()/command-prompt-windows-5820c6f73df78cc2e8961d0f.png)

