Listen up, tech enthusiasts! If you're into tinkering with Raspberry Pi and want to remotely access its desktop from your Windows 10 machine, you're in the right place. Remote access to your Raspberry Pi can save you tons of time and effort, especially if you're managing multiple devices or working from different locations. But hey, before we dive deep, let’s break it down step by step so you won’t feel overwhelmed.
Imagine this: you’ve set up your Raspberry Pi as a home server, media center, or even a retro gaming console. Now, you want to control it without being physically present. Sounds cool, right? That’s where remote desktop access comes into play. With the right tools and setup, you can seamlessly connect to your Raspberry Pi from your Windows 10 PC and control it as if you were sitting right in front of it.
Don’t worry if you’re new to this. We’ll guide you through every step, from setting up your Raspberry Pi for remote access to troubleshooting common issues. By the end of this article, you’ll be able to remotely access your Raspberry Pi like a seasoned pro. So, grab your favorite drink, and let’s get started!
Read also:Serenity Cox The Rising Star Shining Bright In The Entertainment World
Why Remotely Access Raspberry Pi Remote Desktop on Windows 10?
Before we jump into the technicalities, let’s talk about why you’d want to remotely access your Raspberry Pi. Here are a few reasons that might resonate with you:
- Convenience: Access your Raspberry Pi from anywhere in the world using your Windows 10 PC.
- Efficiency: Manage multiple Raspberry Pi devices without needing physical access to each one.
- Flexibility: Use your Raspberry Pi for tasks like file sharing, media streaming, or running applications without being tied to a single location.
- Cost-Effective: No need to buy expensive hardware when you can use your existing Windows 10 PC to control your Raspberry Pi.
Now that you know the benefits, let’s move on to the nitty-gritty of setting everything up.
What You Need to Get Started
Before diving into the setup process, make sure you have the following essentials:
- A Raspberry Pi (any model will work, but newer models are better for performance).
- A microSD card with Raspberry Pi OS installed.
- An active internet connection for both your Raspberry Pi and Windows 10 PC.
- A keyboard and monitor (temporarily needed for initial setup).
- A remote desktop client installed on your Windows 10 PC (we’ll cover this later).
Got all that? Great! Let’s proceed to the next step.
Setting Up Your Raspberry Pi for Remote Access
Step 1: Enable SSH on Your Raspberry Pi
SSH (Secure Shell) is the backbone of remote access. It allows you to securely connect to your Raspberry Pi from another device. Here’s how you enable it:
- Boot up your Raspberry Pi and log in to the desktop environment.
- Open the Raspberry Pi Configuration tool by typing
sudo raspi-configin the terminal. - Navigate to the “Interfacing Options” menu and select “SSH.”
- Choose “Yes” to enable SSH and then reboot your Raspberry Pi.
Voila! SSH is now enabled on your Raspberry Pi. Next, let’s move on to setting up VNC for remote desktop access.
Read also:What Is The Best Bundle For Tv Phone And Internet Find Out Now
Installing and Configuring VNC on Raspberry Pi
Step 2: Install VNC Server
VNC (Virtual Network Computing) allows you to remotely access the graphical desktop of your Raspberry Pi. Here’s how you install and configure it:
- Open the terminal on your Raspberry Pi.
- Type
sudo apt updateto update the package list. - Install VNC by typing
sudo apt install realvnc-vnc-server realvnc-vnc-viewer. - Once installed, enable VNC by going to the Raspberry Pi Configuration tool (
sudo raspi-config) and selecting “Interfacing Options” > “VNC.”
With VNC installed and enabled, your Raspberry Pi is now ready for remote desktop connections. But wait, there’s more!
Connecting to Your Raspberry Pi from Windows 10
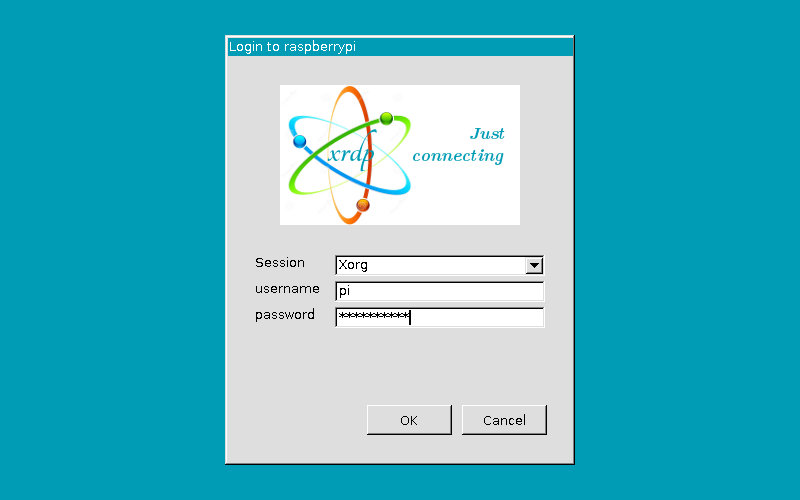
Step 3: Install a VNC Viewer on Windows 10
Now that your Raspberry Pi is set up, it’s time to connect to it from your Windows 10 PC. Here’s what you need to do:
- Download and install the official VNC Viewer from the RealVNC website.
- Launch the VNC Viewer and enter the IP address of your Raspberry Pi in the connection field.
- Log in using your Raspberry Pi’s username and password.
Boom! You’re now connected to your Raspberry Pi’s desktop from your Windows 10 PC. But what if you want to access it from outside your local network? Let’s explore that next.
Accessing Raspberry Pi Remotely via the Internet
Step 4: Set Up Port Forwarding
To access your Raspberry Pi from anywhere in the world, you’ll need to set up port forwarding on your router. Here’s a quick guide:
- Log in to your router’s admin interface (usually by typing
192.168.0.1or192.168.1.1in your browser). - Find the port forwarding section and create a new rule.
- Set the external port to 5900 (the default VNC port) and the internal IP address to your Raspberry Pi’s local IP.
- Save the changes and test the connection by entering your public IP address in the VNC Viewer.
Port forwarding might sound intimidating, but it’s pretty straightforward once you get the hang of it. Just make sure to secure your connection with strong passwords and consider using a dynamic DNS service for easier access.
Troubleshooting Common Issues
Step 5: Fixing Connection Problems
Even with the best setup, you might encounter some issues. Here are a few common problems and their solutions:
- Cannot Connect: Double-check the IP address and ensure that SSH and VNC are enabled on your Raspberry Pi.
- Slow Performance: Try reducing the screen resolution or disabling desktop effects on your Raspberry Pi.
- Security Concerns: Use strong passwords and consider enabling two-factor authentication for added security.
If you’re still stuck, don’t hesitate to reach out to the Raspberry Pi community or consult the official documentation.
Advanced Tips for Power Users
Step 6: Automate Your Setup
For those who want to take their remote access game to the next level, here are a few advanced tips:
- Use SSH Tunnels: Create secure tunnels for accessing your Raspberry Pi from untrusted networks.
- Set Up a Static IP: Assign a static IP address to your Raspberry Pi to avoid connection issues.
- Explore Alternative Clients: Try tools like TeamViewer or AnyDesk for a different remote access experience.
These tips might require a bit more technical know-how, but they can significantly enhance your remote access capabilities.
Conclusion: Take Your Raspberry Pi to the Next Level
And there you have it, folks! You now know how to remotely access your Raspberry Pi’s desktop from your Windows 10 PC. Whether you’re managing a home server, running a media center, or just tinkering with cool projects, remote access can make your life so much easier.
Remember, the key to successful remote access is preparation and patience. Take the time to set everything up properly, and don’t hesitate to troubleshoot if things don’t work as expected. And most importantly, have fun experimenting with your Raspberry Pi!
So, what are you waiting for? Go ahead and try out these steps. Once you’ve mastered remote access, share your experience in the comments below. And if you found this article helpful, don’t forget to share it with your friends and fellow tech enthusiasts. Happy tinkering!
Table of Contents
- Why Remotely Access Raspberry Pi Remote Desktop on Windows 10?
- What You Need to Get Started
- Setting Up Your Raspberry Pi for Remote Access
- Installing and Configuring VNC on Raspberry Pi
- Connecting to Your Raspberry Pi from Windows 10
- Accessing Raspberry Pi Remotely via the Internet
- Troubleshooting Common Issues
- Advanced Tips for Power Users
- Conclusion: Take Your Raspberry Pi to the Next Level