Listen up, tech enthusiasts and cloud wizards! If you've ever scratched your head trying to figure out how to securely connect remote IoT devices using a VPC, Raspberry Pi, and AWS, you're in the right place. This isn't just another tech article; it's your one-stop-shop for mastering this complex yet crucial setup. Whether you're a seasoned developer or a curious beginner, we've got you covered. So grab a cup of coffee, and let's dive in!
Imagine this: you’ve built a killer IoT project using your trusty Raspberry Pi, but now you want to take it to the next level by connecting it securely to the cloud. Sounds exciting, right? But hold on—how do you ensure that your data is safe while maintaining seamless communication between your devices? That’s where AWS Virtual Private Cloud (VPC) comes into play. It’s like giving your IoT network its own private VIP lounge in the cloud.
In this guide, we’ll walk you through everything you need to know about secure remote IoT connections using VPC, Raspberry Pi, and AWS. We’ll cover the basics, advanced configurations, best practices, and even throw in some real-world examples to keep things interesting. By the end of this article, you’ll be ready to deploy your own secure IoT infrastructure like a pro. Let’s get started!
Read also:Donna Kelce Hospitalized The Untold Story Behind The Headlines
Table of Contents
- Introduction
- What is AWS VPC?
- Raspberry Pi Setup Basics
- IoT Security: Why It Matters
- Connecting Raspberry Pi to VPC
- AWS Example: Step-by-Step Guide
- Best Practices for Secure Connections
- Troubleshooting Common Issues
- Scaling Your IoT Network
- Conclusion
What is AWS VPC?
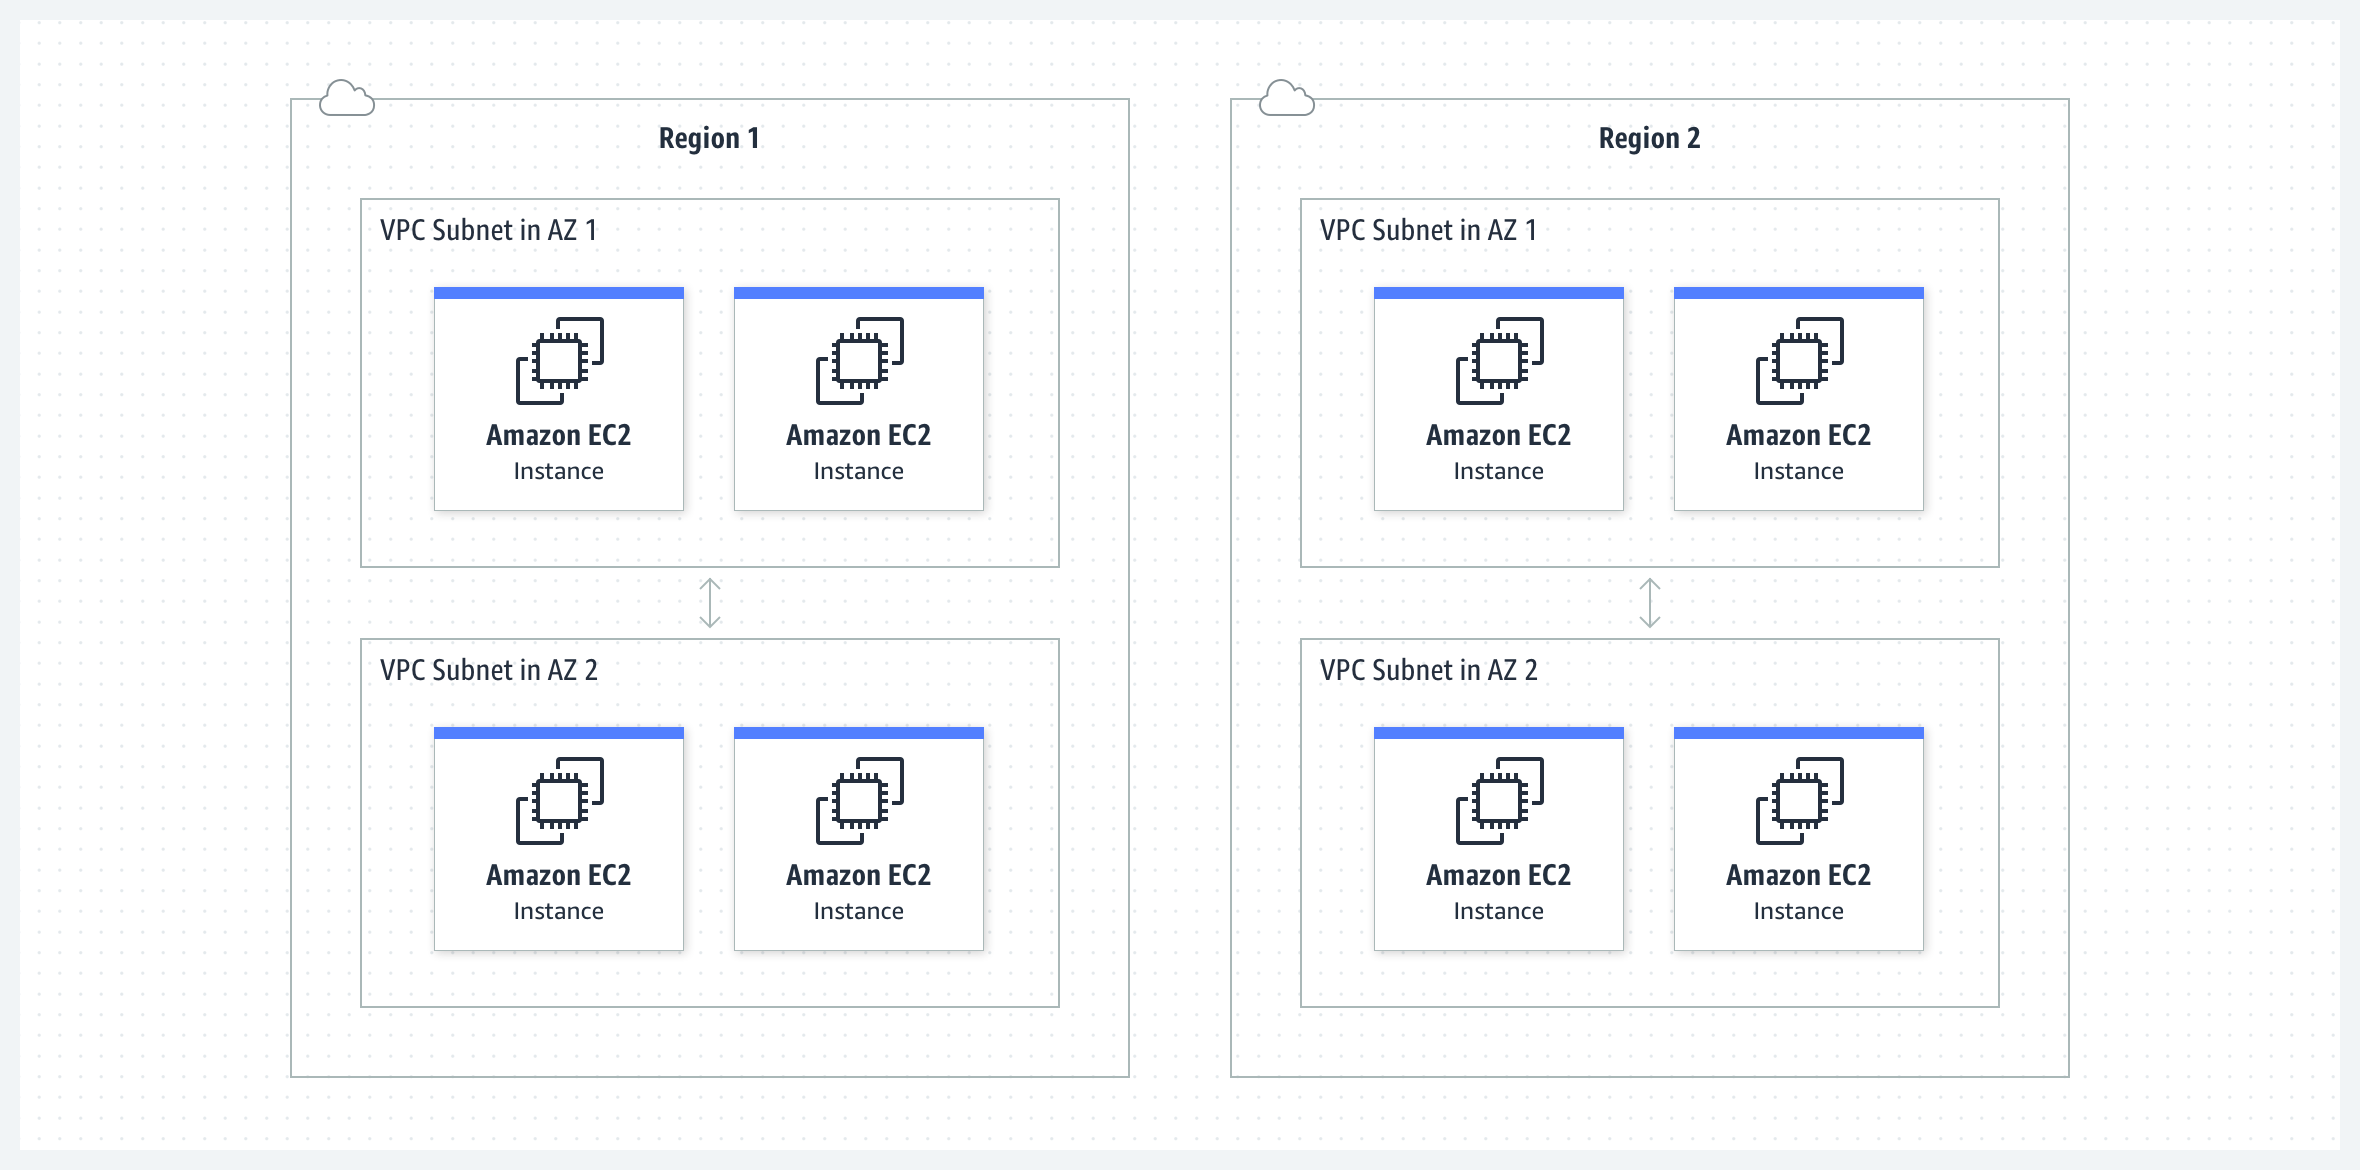
Alright, let’s start with the basics. AWS VPC (Virtual Private Cloud) is basically your private slice of the AWS cloud. Think of it as a virtual network that you can configure just like you would an on-premises network. With VPC, you get to control things like IP address ranges, subnets, route tables, and network gateways. It’s the perfect playground for securely hosting your IoT applications.
Here’s why VPC is such a big deal when it comes to secure remote IoT connections:
- Isolation: Keeps your IoT devices away from the public internet, reducing the risk of unauthorized access.
- Customization: You can tailor the network settings to fit your specific needs.
- Security: Offers features like security groups and network access control lists (NACLs) to protect your data.
Why Use VPC for IoT?
VPC isn’t just for big enterprises; it’s also super useful for small-scale IoT projects. For instance, if you’re building a smart home system with multiple Raspberry Pi devices, VPC ensures that all your devices communicate securely without exposing sensitive data to the outside world.
Raspberry Pi Setup Basics
Now, let’s talk about the star of the show—your trusty Raspberry Pi. Setting up your Pi for an IoT project might seem intimidating at first, but trust me, it’s easier than you think. Here’s a quick rundown of what you’ll need:
- Raspberry Pi board (any model will do, but Pi 4 is recommended for better performance).
- A microSD card with at least 16GB of storage.
- Raspbian OS (or any other Linux-based operating system you prefer).
- A stable internet connection.
Once you’ve got everything ready, follow these steps to set up your Pi:
- Download and install Raspberry Pi Imager to flash the OS onto your microSD card.
- Insert the microSD card into your Pi and power it up.
- Connect to Wi-Fi or Ethernet and update the system using
sudo apt updateandsudo apt upgrade.
Securing Your Raspberry Pi
Security is key when it comes to IoT, so don’t forget to lock down your Pi. Here are a few tips:
Read also:Forever 21 Final Sale Return Policy What You Need To Know Before You Shop
- Change the default password immediately.
- Disable SSH access if you’re not using it.
- Keep your software up to date to patch vulnerabilities.
IoT Security: Why It Matters
Let’s be real here—IoT security isn’t something you can afford to overlook. With more and more devices connected to the internet, the risk of cyberattacks is higher than ever. A single breach could compromise not only your data but also your entire network.
Here are some scary stats to drive the point home:
- According to a report by Symantec, IoT attacks increased by 600% in 2020.
- By 2025, there will be over 75 billion IoT devices connected worldwide.
Now, imagine all those devices being vulnerable to hackers. Scary, right? That’s why securing your IoT setup with tools like VPC is so important.
Common IoT Security Threats
Before we move on, let’s quickly go over some common IoT security threats:
- Malware infections.
- Denial-of-Service (DoS) attacks.
- Data breaches.
By using a secure connection through VPC, you can significantly reduce the risk of these threats.
Connecting Raspberry Pi to VPC
Alright, let’s get to the juicy part—connecting your Raspberry Pi to AWS VPC. This is where the magic happens. Follow these steps to set up a secure connection:
- Create a new VPC in the AWS Management Console.
- Set up subnets and configure routing tables.
- Launch an EC2 instance within the VPC to act as a bridge for your Raspberry Pi.
- Install and configure an SSH client on your Pi to connect to the EC2 instance.
Voila! Your Raspberry Pi is now securely connected to your VPC.
Why Use EC2 as a Bridge?
Using an EC2 instance as a bridge allows your Raspberry Pi to communicate with other devices in the VPC without exposing it directly to the internet. It’s like having a secure tunnel for your data to travel through.
AWS Example: Step-by-Step Guide
Let’s walk through a real-world example to make things clearer. Suppose you’re building a weather monitoring system using Raspberry Pi. Here’s how you can set it up with AWS VPC:
- Create a VPC with two subnets—one public and one private.
- Launch an EC2 instance in the public subnet.
- Configure a NAT gateway to allow outbound internet access from the private subnet.
- Set up a security group to allow SSH access from your Raspberry Pi.
- Connect your Pi to the EC2 instance using SSH.
With this setup, your weather data can be securely transmitted to the cloud for processing and storage.
Tools and Services to Use
Here are some AWS services that can enhance your IoT setup:
- AWS IoT Core: For managing and securing IoT devices.
- Amazon S3: For storing large amounts of data.
- Amazon DynamoDB: For handling NoSQL databases.
Best Practices for Secure Connections
Now that you’ve got the basics down, let’s talk about some best practices to ensure your IoT setup remains secure:
- Use strong encryption protocols for data transmission.
- Regularly monitor your network for suspicious activity.
- Implement multi-factor authentication wherever possible.
Remember, security is an ongoing process, not a one-time fix. Stay vigilant and keep your systems up to date.
Monitoring and Maintenance
Don’t forget to monitor your IoT devices regularly. Use tools like AWS CloudWatch to keep an eye on your network performance and detect any anomalies. Regular maintenance will help you catch potential issues before they become major problems.
Troubleshooting Common Issues
Even the best-laid plans can go awry sometimes. Here are some common issues you might encounter and how to fix them:
- Problem: Can’t connect to EC2 instance.
- Solution: Check your security group settings and ensure SSH is allowed.
- Problem: Data transmission is slow.
- Solution: Optimize your network configuration and use faster storage options like Amazon EBS.
Don’t get discouraged if things don’t work perfectly at first. Troubleshooting is part of the learning process.
Scaling Your IoT Network
As your IoT project grows, you’ll need to scale your infrastructure to accommodate more devices. AWS makes this process relatively painless. Here are some tips for scaling your IoT network:
- Use auto-scaling groups to automatically adjust resources based on demand.
- Implement load balancers to distribute traffic evenly across devices.
- Consider using AWS Lambda for serverless computing to handle large amounts of data.
Scaling doesn’t have to be complicated. With the right tools and planning, you can grow your IoT network seamlessly.
Conclusion
And there you have it—the ultimate guide to securely connecting remote IoT devices using VPC, Raspberry Pi, and AWS. We’ve covered everything from the basics of VPC to advanced configurations and best practices. By following the steps outlined in this article, you’ll be well on your way to building a secure and scalable IoT infrastructure.
So what are you waiting for? Take action now! Leave a comment below sharing your thoughts or questions. And don’t forget to share this article with your fellow tech enthusiasts. Together, we can build a safer and smarter IoT world. Cheers! 🚀