So, listen up, folks. If you're looking to dive into the world of remote IoT (Internet of Things) management on your Mac without relying on third-party tools, you've come to the right place. This guide is packed with actionable tips, tricks, and a pinch of tech-savviness to help you master SSH (Secure Shell) like a pro. Whether you're a beginner or an experienced techie, this article will walk you through every step of the process. Ready? Let's get started.
SSH is not just some random tech term—it's your golden ticket to securely accessing and managing IoT devices remotely. Imagine being able to control your smart gadgets from anywhere in the world without the hassle of installing extra software. Sounds too good to be true? Well, it's not. With the right know-how, you can make it happen. And guess what? We’re about to spill all the beans.
Now, before we dive deep into the nitty-gritty, let me clarify something. This isn't just another tech article filled with jargon that leaves you more confused than enlightened. No way, Jose. This is a practical, easy-to-follow guide designed to help you achieve your goals. So, buckle up, because we’re about to take you on a journey that’ll transform you into an SSH Remote IoT guru.
Read also:Shopping At Iah Your Ultimate Guide To Houstons Shopping Paradise
Why SSH for Remote IoT on Mac?
First things first, why even bother with SSH when there are so many other options out there? Well, let me break it down for you. SSH is like the Swiss Army knife of remote access tools. It’s secure, reliable, and built right into your Mac, so you don’t need to download anything extra. Plus, it’s free! Who doesn’t love free stuff, right?
When it comes to managing IoT devices, security is king. SSH encrypts all communication between your Mac and the IoT device, keeping prying eyes at bay. And let’s face it, in today’s world, where cyber threats are lurking around every corner, having a secure connection is not just a luxury—it’s a necessity.
What You Need to Get Started
Before we jump into the how-to, let’s talk about what you’ll need to get started. Don’t worry, it’s not a long list. In fact, you probably already have everything you need:
- A Mac with Terminal access (duh)
- An IoT device with SSH enabled (check the device manual if you're unsure)
- A stable internet connection (preferably wired for better performance)
- A little bit of patience and a can-do attitude
That’s it. Simple, right? No complicated setups or expensive hardware required. Now, let’s move on to the fun part.
Step-by-Step Guide: How to Use SSH Remote IoT on Mac
Alright, here’s where the magic happens. Follow these steps carefully, and you’ll be up and running in no time.
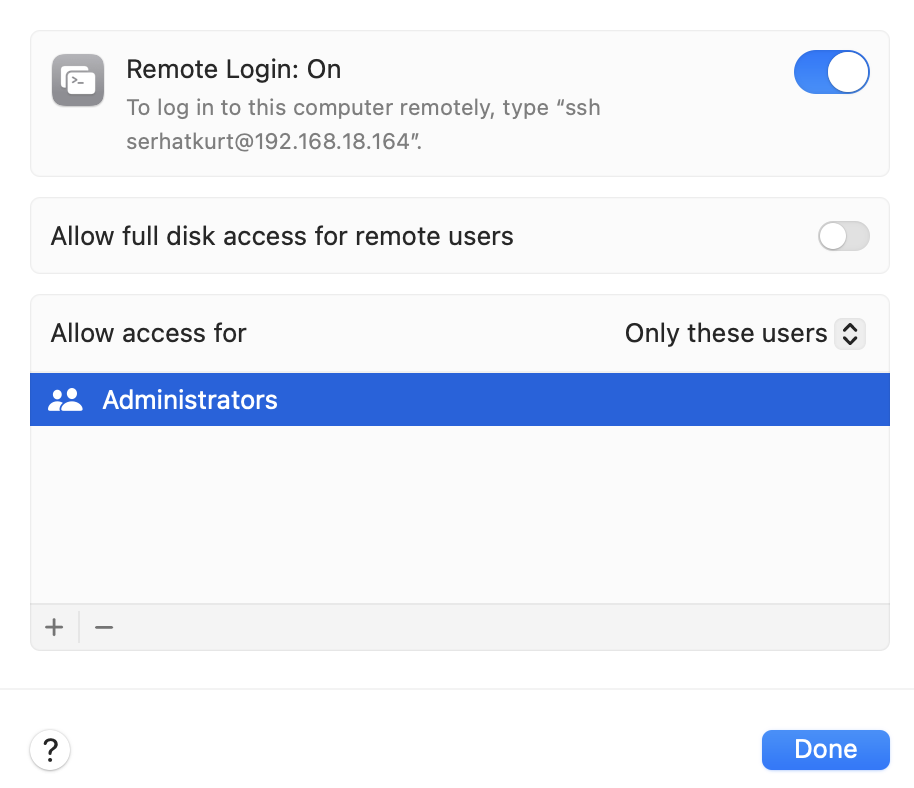
Step 1: Enable SSH on Your IoT Device
The first step is to make sure SSH is enabled on your IoT device. Most modern IoT devices come with SSH pre-installed, but you might need to activate it manually. Check the device’s manual or manufacturer’s website for specific instructions.
Read also:How Tall Laura Ingraham The Real Story Behind The Numbers
For example, if you’re using a Raspberry Pi, you can enable SSH by navigating to the Raspberry Pi Configuration tool or simply creating an empty file named "ssh" in the boot partition. Easy peasy lemon squeezy.
Step 2: Find the IP Address of Your IoT Device
Next, you’ll need to find the IP address of your IoT device. This is the unique identifier that allows your Mac to connect to it over the network. You can usually find this information in the device’s settings or by checking your router’s connected devices list.
Pro tip: If you’re having trouble finding the IP address, try using a network scanning tool like Angry IP Scanner. It’s lightweight, free, and works like a charm.
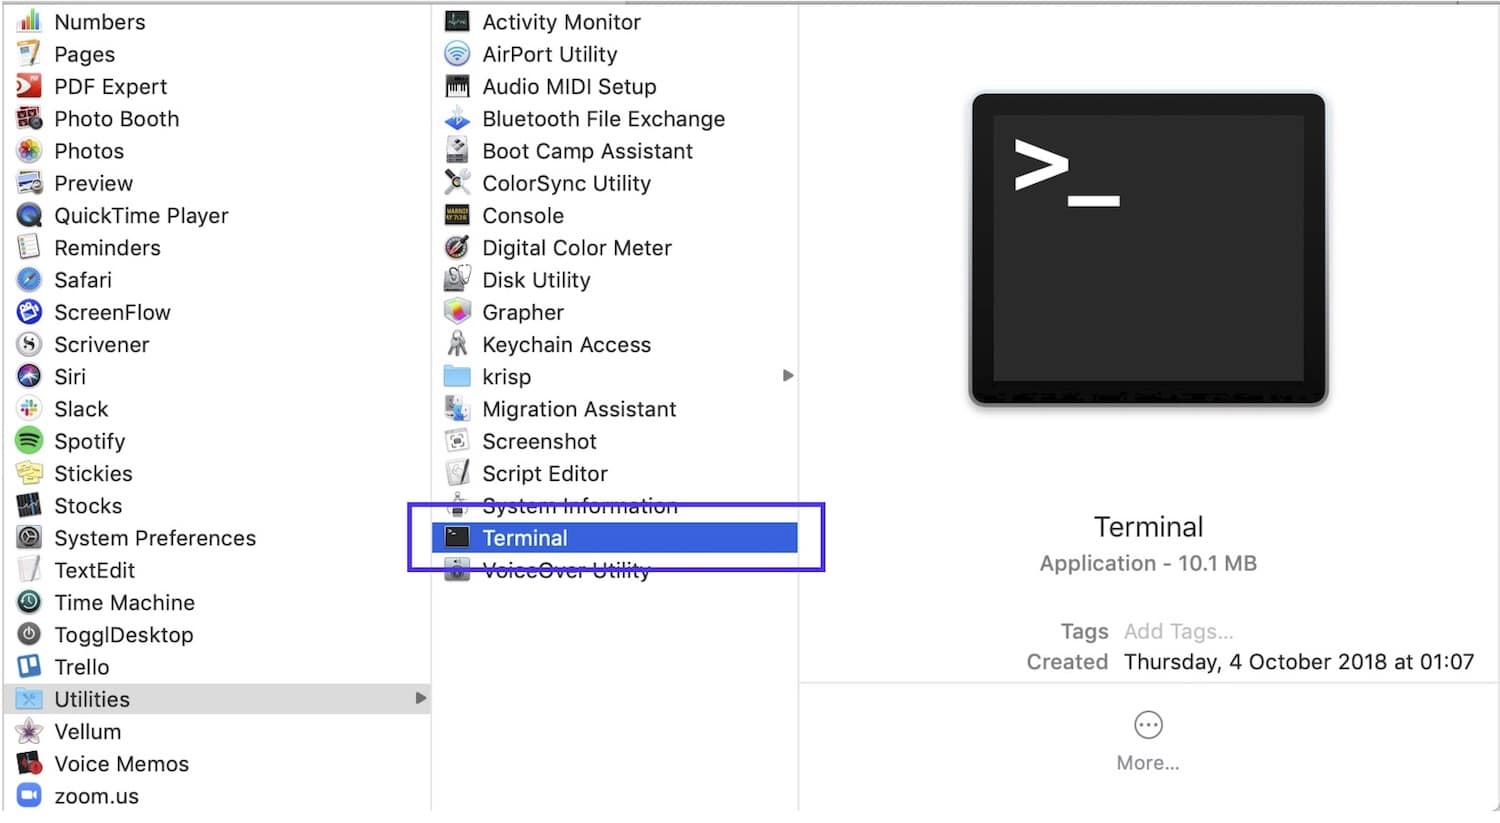
Step 3: Open Terminal on Your Mac
Now it’s time to fire up Terminal. You can find it by searching for "Terminal" in Spotlight or navigating to Applications > Utilities > Terminal. Once you’ve got it open, you’re ready to roll.
Step 4: Connect to Your IoT Device via SSH
Here’s where the real action begins. To connect to your IoT device, type the following command into Terminal:
ssh username@ip_address
Replace "username" with the actual username for your IoT device and "ip_address" with the IP address you found earlier. Hit Enter, and you’ll be prompted to enter the password for the device. Once you’ve entered it, voilà! You’re connected.
Troubleshooting Common Issues
Let’s face it, things don’t always go as planned. If you’re having trouble connecting to your IoT device, don’t panic. Here are a few common issues and how to fix them:
- Connection Refused: Double-check the IP address and make sure SSH is enabled on the device.
- Permission Denied: Ensure you’re using the correct username and password. Also, verify that the user has SSH access permissions.
- Network Issues: Make sure both your Mac and IoT device are connected to the same network.
Still stuck? Don’t hesitate to reach out to the device manufacturer’s support team or consult online forums. Chances are, someone else has already encountered and solved the same issue.
Best Practices for Secure SSH Connections
Security should always be at the forefront of your mind when working with remote IoT devices. Here are a few best practices to keep your connections safe:
- Use strong, unique passwords for your IoT devices.
- Consider setting up key-based authentication for added security.
- Regularly update your devices’ firmware to patch any vulnerabilities.
- Limit SSH access to trusted IP addresses whenever possible.
By following these simple tips, you’ll significantly reduce the risk of unauthorized access and keep your IoT devices safe from harm.
Advanced SSH Features to Explore
Once you’ve mastered the basics, it’s time to take your SSH skills to the next level. Here are a few advanced features you might want to explore:
SSH Tunneling
SSH tunneling allows you to securely transfer data between your Mac and IoT device over unsecured networks. This is especially useful if you’re working in public Wi-Fi environments.
Port Forwarding
Port forwarding enables you to access specific services running on your IoT device from your Mac. For example, you could use it to remotely access a web server or database hosted on the device.
SSH Config File
The SSH config file lets you save frequently used connection settings, making it easier and faster to connect to your IoT devices. Simply edit the file located at ~/.ssh/config and add your device’s details.
Real-World Applications of SSH Remote IoT
Now that you know how to use SSH for remote IoT on Mac, let’s talk about some real-world applications. The possibilities are endless, but here are a few examples to get your creative juices flowing:
- Monitor and control smart home devices from anywhere.
- Remotely manage industrial IoT devices in factories or warehouses.
- Access and troubleshoot IoT sensors deployed in remote locations.
As the Internet of Things continues to grow, the demand for secure, reliable remote management solutions will only increase. By mastering SSH, you’ll be well-equipped to tackle whatever challenges come your way.
Data and Statistics to Support SSH Usage
According to a recent study by IoT Analytics, the global IoT market is expected to grow to over 27 billion connected devices by 2025. That’s a lot of gadgets that need managing! And with cyber threats on the rise, secure remote access solutions like SSH are more important than ever.
Another interesting statistic: SSH is used by over 80% of IT professionals for remote server management. Why? Because it’s secure, reliable, and easy to use once you get the hang of it. So, if the pros are using it, maybe you should too.
Conclusion: Take Your IoT Game to the Next Level
There you have it, folks. A comprehensive guide to using SSH for remote IoT management on your Mac without relying on third-party tools. From enabling SSH on your device to troubleshooting common issues, we’ve covered it all.
Remember, mastering SSH is more than just learning a new skill—it’s about empowering yourself to take control of your IoT devices and make the most of the technology at your fingertips. So, what are you waiting for? Go ahead and give it a try. And when you’re done, don’t forget to share your experience in the comments below.
Oh, and one last thing. If you found this article helpful, be sure to check out our other guides on all things tech-related. Who knows? You might just discover your next big passion.
Table of Contents
- Why SSH for Remote IoT on Mac?
- What You Need to Get Started
- Step-by-Step Guide: How to Use SSH Remote IoT on Mac
- Troubleshooting Common Issues
- Best Practices for Secure SSH Connections
- Advanced SSH Features to Explore
- Real-World Applications of SSH Remote IoT
- Data and Statistics to Support SSH Usage
- Conclusion: Take Your IoT Game to the Next Level