Listen up, tech wizards. If you're diving into the world of IoT, you've probably come across the term "remote IoT device SSH tutorial." Imagine this: you're building a smart home system or a weather station in a remote location, and you need to configure or troubleshoot your IoT devices without being physically present. That's where SSH comes in, and mastering it can be a game-changer. So, buckle up because we're about to deep dive into the nuts and bolts of remote IoT device management through SSH.
SSH, or Secure Shell, is like a superhero cape for your IoT devices. It allows you to securely access and control your devices from anywhere in the world. Whether you're a seasoned developer or a beginner tinkering with Raspberry Pi, understanding how SSH works is crucial. In this guide, we'll walk you through everything you need to know, step by step, so you can take full control of your IoT setup.
But wait, why should you care about remote IoT device SSH? Well, let's say you've got a sensor network spread across a large farm or a security camera system in a remote warehouse. Instead of driving hours to fix a configuration issue, you can simply log in via SSH and resolve the problem in minutes. That's efficiency, my friend, and that's what this tutorial is all about. Let's get started!
Read also:Serenety Cox Rising Star In The Entertainment Industry
Understanding the Basics of Remote IoT Device SSH
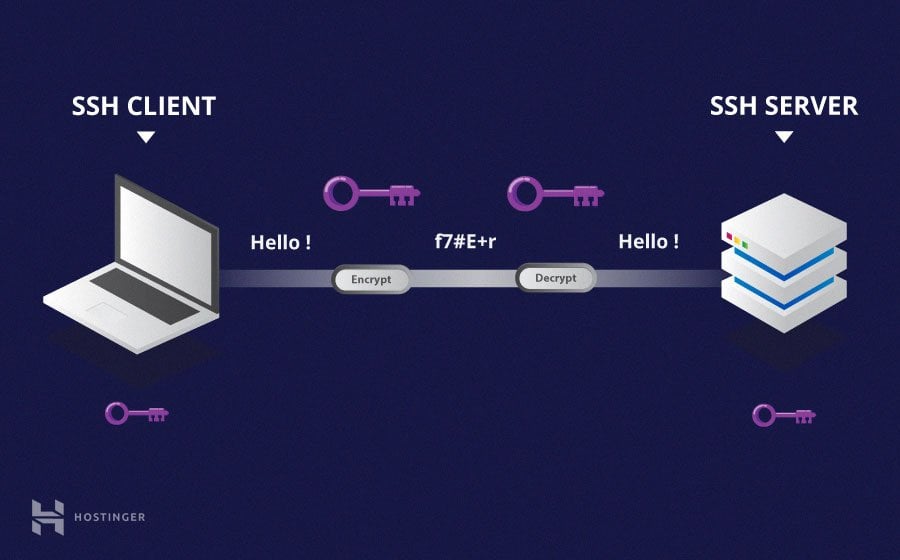
Before we dive into the nitty-gritty, let's break down what SSH actually is. Think of SSH as a secure tunnel between your computer and your IoT device. It encrypts all communication, ensuring that no one can snoop on your data. This is especially important when you're dealing with sensitive information or controlling critical systems.
Why SSH Matters in IoT
Here's the deal: IoT devices are often deployed in remote locations, making physical access a hassle. SSH eliminates this problem by providing a secure and reliable way to manage your devices remotely. Plus, it's free, widely supported, and super easy to set up once you get the hang of it.
Let's talk numbers. According to a recent report by IoT Analytics, the number of active IoT devices is expected to reach 27 billion by 2025. That's a lot of devices, and managing them all manually just isn't feasible. SSH offers a scalable solution, allowing you to manage multiple devices from a single interface.
Setting Up SSH on Your IoT Device
Now that you understand the importance of SSH, let's roll up our sleeves and get to work. Setting up SSH on your IoT device is surprisingly simple, but there are a few key steps you need to follow. Don't worry; we'll guide you through each one.
Step 1: Enable SSH on Your Device
First things first, you need to enable SSH on your IoT device. If you're using a Raspberry Pi, for example, you can do this by running a simple command in the terminal:
sudo raspi-config
Read also:Why Verizon Fios Fiber Is The Ultimate Internet Solution For Your Home
From there, navigate to the "Interfacing Options" menu, select SSH, and enable it. Easy peasy, right?
Step 2: Find Your Device's IP Address
Next, you'll need to find your device's IP address. This is the address you'll use to connect to your device from another computer. You can find it by running the following command:
ifconfig
Look for the "inet" address under the appropriate network interface. That's the IP address you'll need.
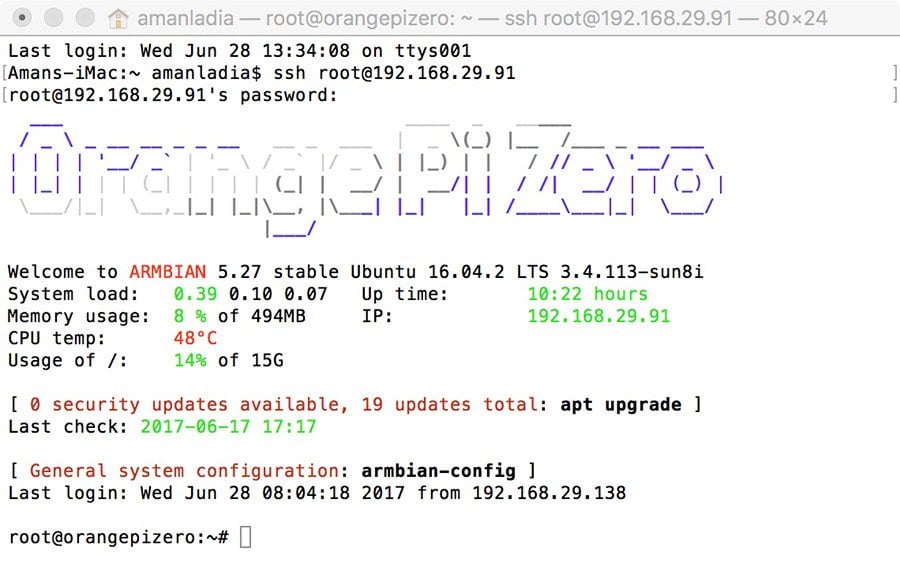
Step 3: Connect to Your Device
Now that you have your device's IP address, it's time to connect. Open a terminal on your computer and type:
ssh username@ip_address
Replace "username" with your device's username and "ip_address" with the IP address you found earlier. If everything is set up correctly, you should be prompted for a password and then gain access to your device.
Securing Your Remote IoT Device SSH Connection
Security is a big deal when it comes to IoT, and SSH is no exception. While SSH is inherently secure, there are additional steps you can take to make your connection even more robust.
Use Strong Passwords
First and foremost, use strong, unique passwords for your devices. Avoid using common passwords like "password123" or "123456." Instead, opt for a mix of uppercase and lowercase letters, numbers, and symbols. And don't forget to change your default passwords!
Enable Key-Based Authentication
Another layer of security is key-based authentication. This method uses a pair of cryptographic keys instead of passwords to authenticate your connection. Here's how you can set it up:
- Generate a key pair on your computer using the
ssh-keygencommand. - Copy the public key to your IoT device using the
ssh-copy-idcommand. - Disable password authentication in the SSH configuration file (
/etc/ssh/sshd_config).
With key-based authentication, even if someone guesses your password, they won't be able to access your device.
Troubleshooting Common SSH Issues
Even the best-laid plans can go awry, and SSH is no exception. Here are some common issues you might encounter and how to fix them.
Connection Refused
If you're getting a "connection refused" error, it usually means that SSH isn't running on your device. Double-check that you've enabled SSH and that your device's firewall isn't blocking incoming connections.
Permission Denied
A "permission denied" error often occurs when you're using the wrong username or password. Make sure you're using the correct credentials and that your device's SSH configuration allows password authentication (if you're not using key-based authentication).
Advanced SSH Techniques for IoT Devices
Once you've mastered the basics, it's time to take your SSH skills to the next level. Here are a few advanced techniques that can make your life easier.
Tunneling and Port Forwarding
SSH tunneling allows you to securely forward traffic from one port to another. This is especially useful if you need to access services on your IoT device that aren't exposed to the internet. For example, you can forward traffic from your local machine's port 8080 to your device's port 80:
ssh -L 8080:localhost:80 username@ip_address
Now, you can access your device's web server by navigating to http://localhost:8080 in your browser.
Automating SSH Connections
Tired of typing in your username and IP address every time you want to connect? You can create an SSH alias in your computer's SSH configuration file (~/.ssh/config):
Host mydevice
HostName ip_address
User username
Now, you can connect to your device with a simple command:
ssh mydevice
Best Practices for Remote IoT Device Management
Managing IoT devices remotely comes with its own set of challenges. Here are some best practices to keep in mind.
Regularly Update Your Devices
Security patches and software updates are crucial for keeping your devices safe. Set up a regular maintenance schedule to ensure that your devices are always up to date.
Monitor Your Devices
Use monitoring tools to keep an eye on your devices' performance and security. This can help you catch potential issues before they become major problems.
Real-World Applications of Remote IoT Device SSH
Let's take a look at some real-world applications of SSH in the IoT space.
Smart Agriculture
Imagine a network of sensors monitoring soil moisture, temperature, and humidity in a large farm. With SSH, farmers can remotely access these sensors to adjust irrigation systems or check data without having to physically visit each location.
Industrial Automation
In factories, SSH can be used to manage and monitor robots and other automated systems. This allows engineers to troubleshoot issues and make adjustments from anywhere in the world.
Conclusion: Take Control of Your IoT Devices
And there you have it, folks. Remote IoT device SSH isn't just a buzzword; it's a powerful tool that can revolutionize the way you manage your IoT setup. By following the steps outlined in this tutorial, you can take full control of your devices and ensure that they're secure and reliable.
Now it's your turn. Whether you're building a smart home, a weather station, or a complex industrial system, SSH can help you achieve your goals. So, what are you waiting for? Get out there and start tinkering!
Before you go, don't forget to leave a comment or share this article with your fellow tech enthusiasts. And if you're hungry for more knowledge, check out our other guides on IoT and beyond. Happy hacking!
Table of Contents
- Understanding the Basics of Remote IoT Device SSH
- Setting Up SSH on Your IoT Device
- Securing Your Remote IoT Device SSH Connection
- Troubleshooting Common SSH Issues
- Advanced SSH Techniques for IoT Devices
- Best Practices for Remote IoT Device Management
- Real-World Applications of Remote IoT Device SSH
- Conclusion: Take Control of Your IoT Devices