Listen up, tech wizards. If you're diving into the world of remote control Raspberry Pi, you're about to unlock a treasure trove of possibilities. Imagine being able to manage your little Raspberry Pi from anywhere in the world. Secure remote control Raspberry Pi is not just a tech buzzword; it's a game-changer for hobbyists, developers, and even businesses. But hey, it's not all sunshine and rainbows. You gotta make sure your setup is as secure as Fort Knox.
Picture this: you're sipping coffee on a tropical beach, and your Raspberry Pi is safely tucked away in your home office. With secure remote control Raspberry Pi, you can tweak settings, run scripts, and monitor performance without lifting a finger. Sounds cool, right? But here's the deal: without proper security measures, your Pi could become an open door for cyber mischief. So, let's dive in and make sure you're doing it right.
This guide is your go-to resource for everything related to secure remote control Raspberry Pi. We'll cover the basics, advanced techniques, and best practices to keep your setup safe and efficient. By the end of this, you'll be a pro at managing your Raspberry Pi remotely without losing sleep over security threats. Let's get started!
Read also:Information Handling Service Your Ultimate Guide To Data Management Solutions
Here’s a quick overview of what we’ll cover:
- Biography of Raspberry Pi
- Getting Started with Secure Remote Control
- Setting Up SSH for Secure Connections
- Configuring Firewalls for Enhanced Security
- Exploring VNC Options for Remote GUI Access
- Using Cloud Solutions for Remote Control
- Best Practices for Secure Remote Control
- Troubleshooting Common Issues
- Advanced Security Tips
- Conclusion and Next Steps
Biography of Raspberry Pi
Before we jump into the nitty-gritty of secure remote control Raspberry Pi, let’s take a moment to appreciate the little device that’s taken the tech world by storm. The Raspberry Pi is more than just a single-board computer; it’s a movement that empowers innovation and learning.
Raspberry Pi: The Basics
Launched in 2012 by the Raspberry Pi Foundation, this affordable and versatile device has become a favorite among hobbyists, educators, and professionals alike. It’s compact, powerful, and ridiculously customizable. Whether you’re building a home automation system or running a web server, the Raspberry Pi can handle it with ease.
| Feature | Details |
|---|---|
| Release Date | February 29, 2012 |
| Creator | Raspberry Pi Foundation |
| Operating Systems | Raspberry Pi OS, Ubuntu, Debian, and more |
| Price Range | $35 - $75 depending on model |
Getting Started with Secure Remote Control
Alright, let’s get our hands dirty. The first step in setting up secure remote control Raspberry Pi is understanding the tools at your disposal. There are several methods to achieve this, but we’ll focus on the most reliable and secure ones.
Why Secure Remote Control Matters
In today’s interconnected world, leaving your Raspberry Pi exposed without proper security measures is like leaving your front door unlocked. Hackers are always on the lookout for vulnerabilities, and an improperly secured Pi is an easy target. Secure remote control Raspberry Pi ensures that only authorized users can access your device, protecting your data and privacy.
Here are a few reasons why secure remote control is crucial:
Read also:Game Schedule St Louis Cardinals Your Ultimate Fan Guide
- Data Protection: Prevent unauthorized access to sensitive information.
- System Integrity: Ensure your Pi remains free from malicious software.
- Peace of Mind: Focus on your projects without worrying about security breaches.
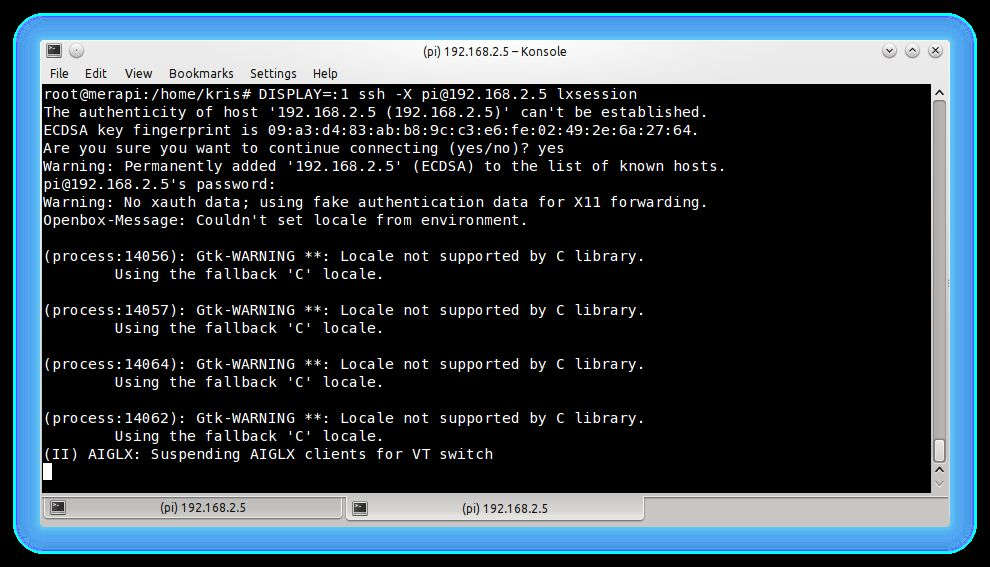
Setting Up SSH for Secure Connections
SSH, or Secure Shell, is one of the most popular methods for secure remote control Raspberry Pi. It provides encrypted communication between your device and the Pi, making it a reliable choice for remote management.
Steps to Enable SSH on Raspberry Pi
Enabling SSH on your Raspberry Pi is surprisingly simple. Follow these steps to get started:
- Boot up your Raspberry Pi and log in to the terminal.
- Run the command
sudo raspi-config. - Navigate to
Interfacing Optionsand selectSSH. - Choose
Enableand exit the configuration tool.
Once SSH is enabled, you can connect to your Pi from another computer using an SSH client like PuTTY (Windows) or the built-in terminal (Mac/Linux).
Configuring Firewalls for Enhanced Security
A firewall acts as a digital bouncer, controlling who gets in and out of your Raspberry Pi. Setting up a firewall is an essential step in securing your remote control setup.
Using UFW for Simple Firewall Management
UFW, or Uncomplicated Firewall, is a user-friendly tool for managing firewall rules on your Raspberry Pi. Here’s how to set it up:
- Install UFW with
sudo apt install ufw. - Allow SSH connections with
sudo ufw allow ssh. - Enable the firewall with
sudo ufw enable.
With UFW in place, you can rest easy knowing that your Pi is protected from unwanted traffic.
Exploring VNC Options for Remote GUI Access
While SSH is great for command-line tasks, sometimes you need a graphical interface to get things done. VNC, or Virtual Network Computing, allows you to access the Raspberry Pi’s desktop remotely.
Setting Up VNC Server on Raspberry Pi
To enable VNC on your Raspberry Pi, follow these steps:
- Open the Raspberry Pi Configuration tool with
sudo raspi-config. - Go to
Interfacing Optionsand enableVNC. - Install a VNC client on your computer and connect to your Pi’s IP address.
VNC provides a seamless way to interact with your Raspberry Pi as if you were sitting right in front of it.
Using Cloud Solutions for Remote Control
For those who want to take their remote control game to the next level, cloud-based solutions offer a convenient and scalable option. Services like ngrok and remot3.it allow you to access your Raspberry Pi from anywhere without dealing with complex network configurations.
How Cloud Solutions Work
Cloud-based remote control services create a secure tunnel between your Raspberry Pi and the internet. This eliminates the need for port forwarding and static IP addresses, making it easier to manage your device from anywhere in the world.
Best Practices for Secure Remote Control
Now that you’ve set up your Raspberry Pi for remote control, let’s talk about best practices to keep it secure. These tips will help you avoid common pitfalls and ensure your setup remains rock-solid.
1. Use Strong Passwords
Weak passwords are a hacker’s best friend. Always use strong, unique passwords for your Raspberry Pi and avoid using default credentials.
2. Regularly Update Your System
Keeping your Raspberry Pi’s software up to date is crucial for security. Regular updates patch vulnerabilities and improve performance.
3. Monitor Access Logs
Regularly check your Pi’s access logs for suspicious activity. Tools like fail2ban can automatically block IP addresses that attempt unauthorized access.
Troubleshooting Common Issues
Even with the best-laid plans, things can go wrong. Here are some common issues you might encounter when setting up secure remote control Raspberry Pi and how to fix them.
Problem: Unable to Connect via SSH
Solution: Double-check your IP address and ensure SSH is enabled on your Raspberry Pi. If the problem persists, try restarting your Pi and your network router.
Problem: Slow VNC Connection
Solution: Optimize your VNC settings for lower resolution and color depth. Additionally, ensure your internet connection is stable and fast.
Advanced Security Tips
For those who want to take their Raspberry Pi security to the next level, here are some advanced tips:
- Use Two-Factor Authentication: Add an extra layer of security by requiring a second form of verification.
- Restrict Access by IP Address: Limit who can connect to your Pi by configuring your firewall to only allow specific IP addresses.
- Encrypt Your Data: Use tools like VeraCrypt to encrypt sensitive files stored on your Raspberry Pi.
Conclusion and Next Steps
And there you have it, folks. Secure remote control Raspberry Pi doesn’t have to be a daunting task. With the right tools and best practices, you can manage your Pi from anywhere with confidence. Remember, security is an ongoing process, so stay vigilant and keep learning.
Now it’s your turn to take action. Leave a comment below and let me know how you plan to use your Raspberry Pi remotely. Share this article with your tech-savvy friends and explore more tutorials on our site. Happy hacking!